Secure static sites with Travis, S3 and CloudFront
Published 16 March 2018
Hosting static websites has become wonderfully simple with services like GitHub pages. Unfortunately GitHub pages doesn’t support SSL with custom domains, so let’s use Travis, S3 and CloudFront to create our own secure serverless static website hosting.
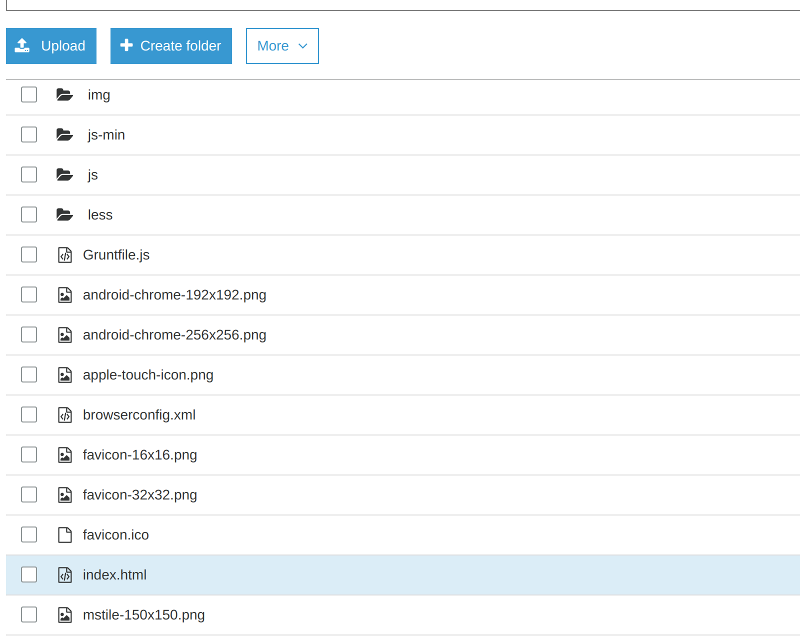
For the purpose of this blog post I am going to assume you already have a static website sitting in a git repository somewhere, most likely GitHub.
Create the S3 bucket
S3 is a file storage solution offered by AWS. It cheap and easy to integrate with so it’s a perfect choice to store our static HTML, CSS and JavaScript files.
Creating the S3 bucket with the correct settings is a bit of a chore so here’s the step by step process:
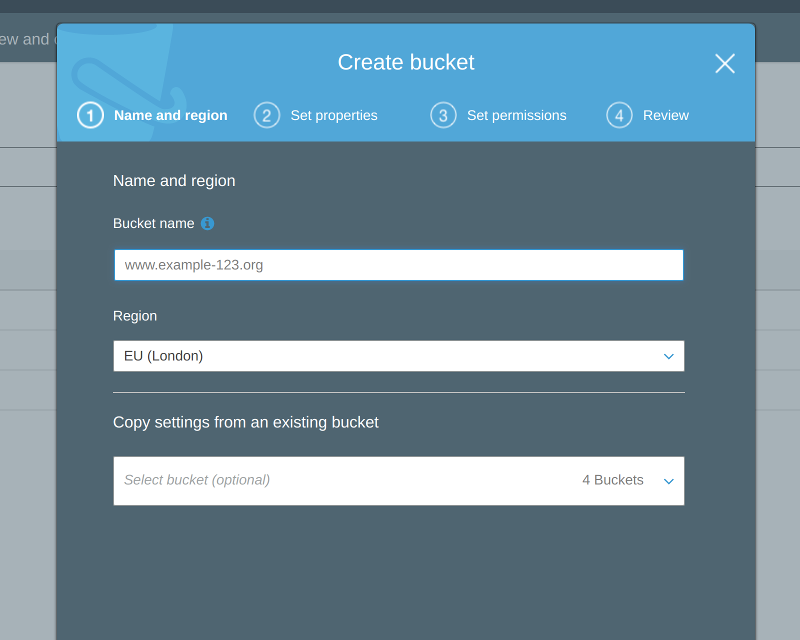 1. Create the bucket and enter a bucket name.
 2. Nothing to do here, move along.
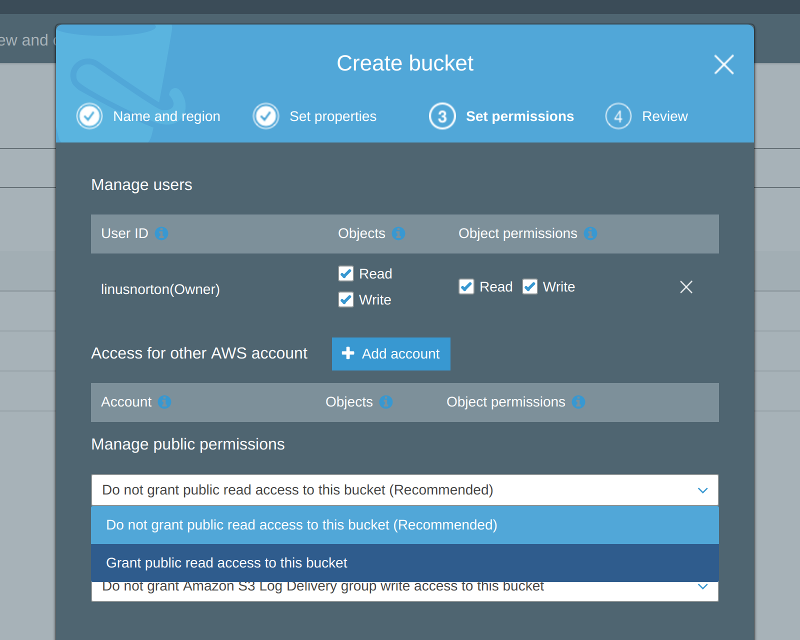 3. Select “Grant public read access to this bucket”.
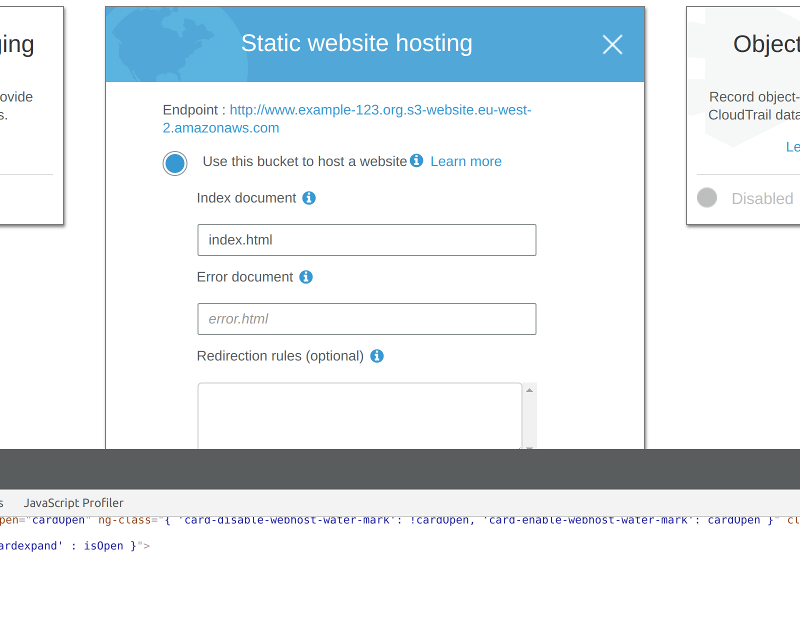
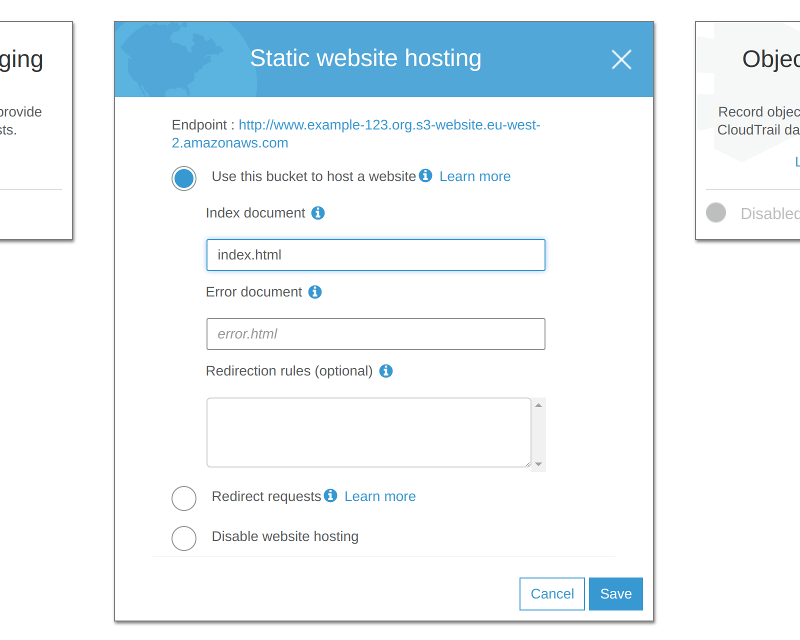 4. Go to the properties tab and select “Static website hosting”.
After you’ve completed those steps you will need to set the Bucket Policy to allow every one to read the content. Select the “Permissions” tab and paste this into the Policy Editor:
{
    "Version": "2012-10-17",
    "Statement": [
        {
            "Sid": "PublicReadGetObject",
            "Effect": "Allow",
            "Principal": "*",
            "Action": "s3:GetObject",
            "Resource": "arn:aws:s3:::www.example-123.org/*"
        }
    ]
}
Replace www.example-123.org with the bucket name you used in step 1.
Deployment
Now that we have our S3 bucket set up we need to set up the deployment pipeline to ensure our website is published every time we update the content.
Travis CI is an easy to use continuous integration server. It’s free as long as your git repository is open source which is perfect for static sites.
We’re going to set up Travis to push the website contents into the S3 bucket every time the git repository is updated.
First we need to give Travis access to our S3 by creating a user in our AWS account. Go to the IAM section and click Add user.
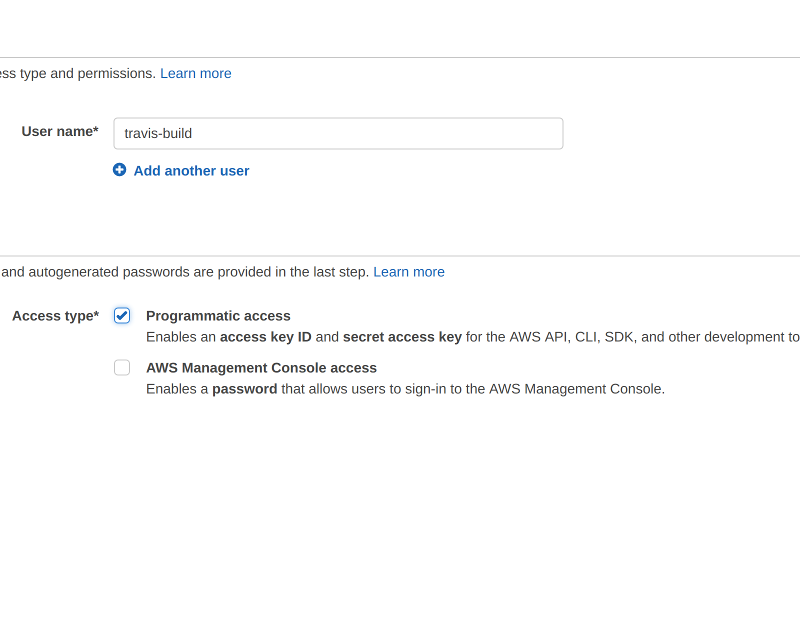 1. Select “Programmatic access”.
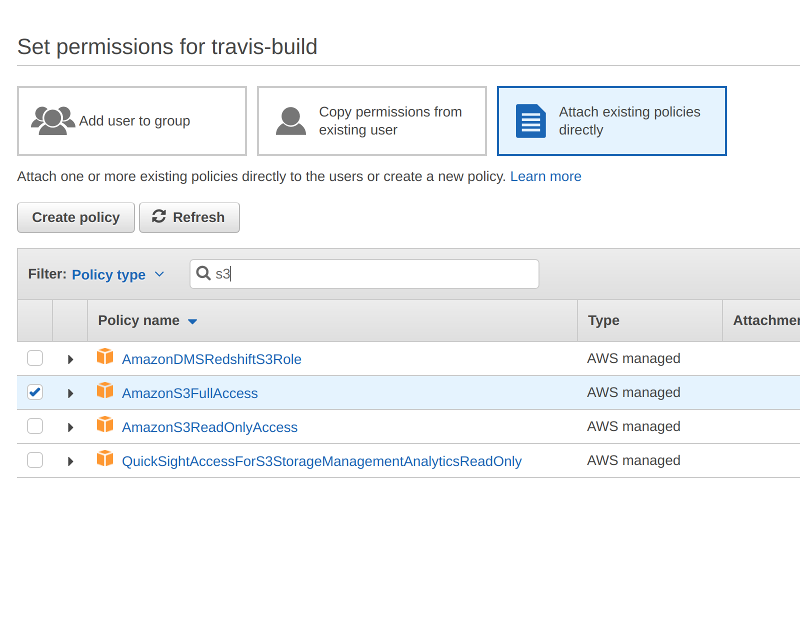 2. Give the user access to S3.
 3. Give the user access to CloudFront.
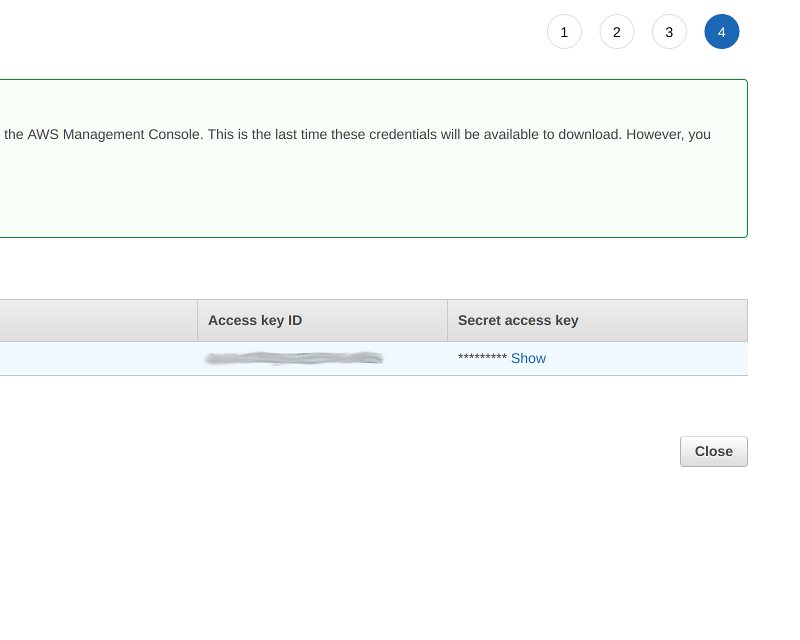 4. Note down your ID and Key.
Next we need to create a .travis.yml to tell Travis to upload our site to S3 after any changes have been pushed to the master branch.
language: node_js
node_js:
- 9
install:
  - pip install --user awscli
script: exit 0
deploy:
  provider: s3
  access_key_id: $AWS_ACCESS_KEY_ID
  secret_access_key: $AWS_SECRET_ACCESS_KEY
  bucket: www.example-123.org
  local-dir: ./
  skip_cleanup: true
  region: eu-west-2
  on:
    branch: master
If you have any build steps for your website (like Jekyll) can you can also plug them in here.
As we don’t want everyone to know our AWS API ID and key we put those in as variables that Travis will replace later. To set them up go to your settings in Travis and add them in the “Environment Variables” section.
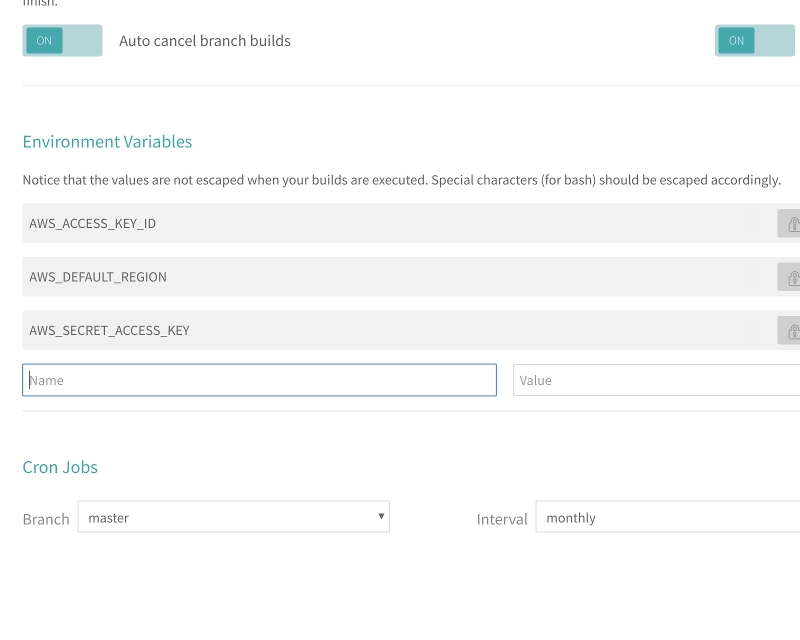 1. Set the environment variables.
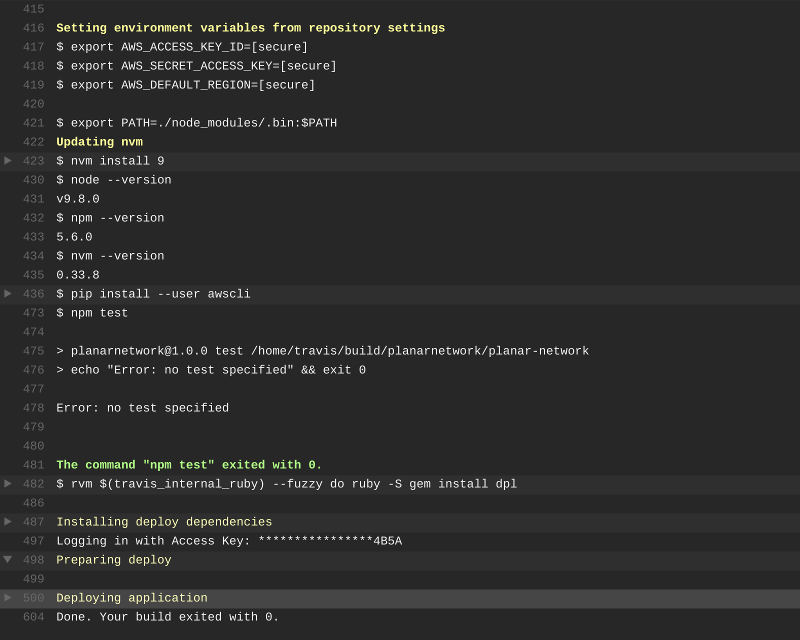 2. Trigger a build.
 3. Check the files made it to S3.
 4. Get the S3 URL.
Note that in step 1 your default region will be something like eu-west-2 depending on what region you created your S3 bucket.
Take the URL from step 4 and open it in your browser. Hopefully you should see a copy of your site.
Set up CloudFront
Now that we the site set up and deployed to our S3 bucket we can distribute it to our CDN, CloudFront. For most static sites a CDN would be overkill. The reason we’re using CloudFront is because Amazon give away free SSL certificates for all their CloudFront deployments.
The process for setting up a CloudFront distribution is fraught with potential pitfalls and debugging issues with CloudFront is a nightmare… so try not to mess up ^_^.
 1. Go straight to “Request or Import a Certificate with ACM”.
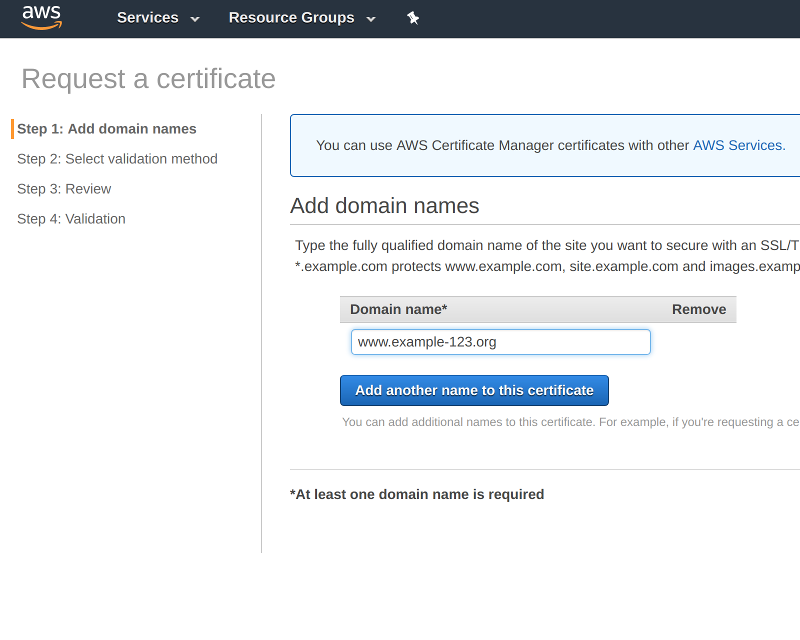 2. Enter your domain name and complete the steps.
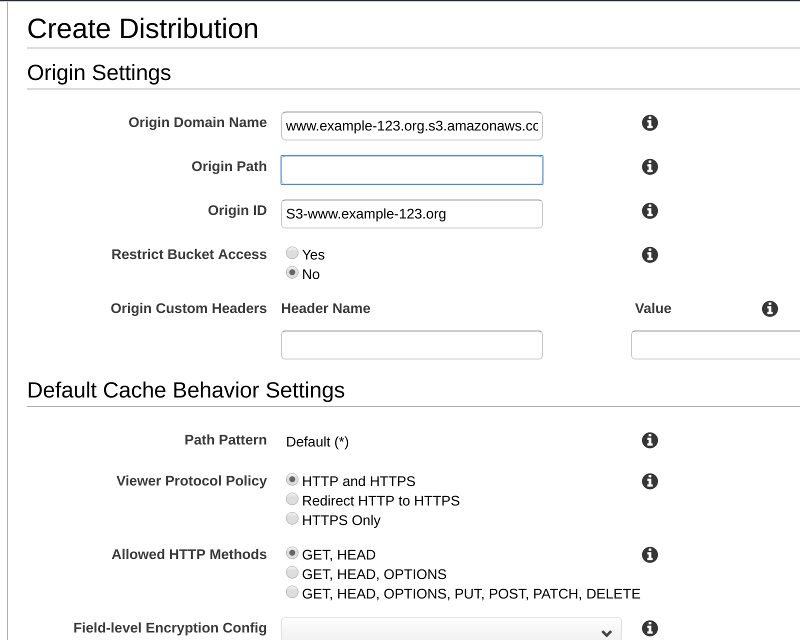 3. Reload the page and enter the Origin Domain Name and Origin ID.
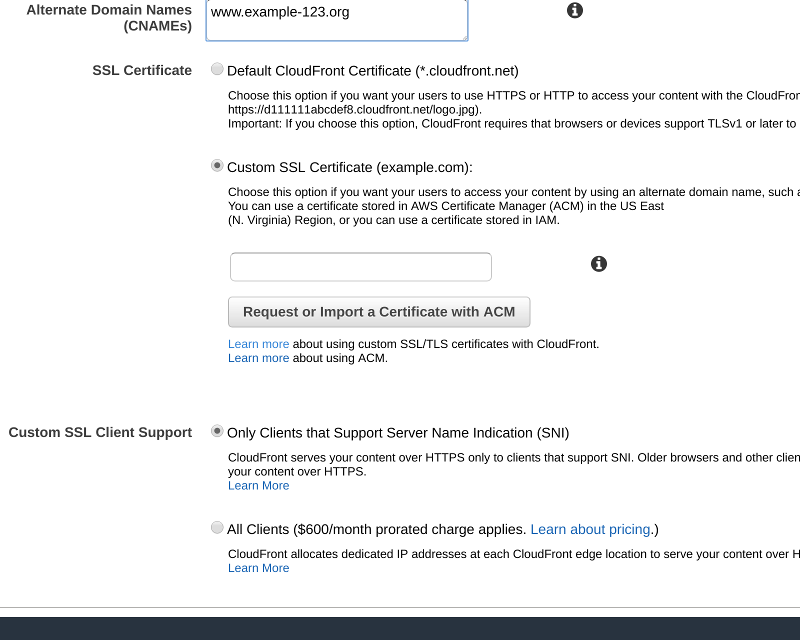
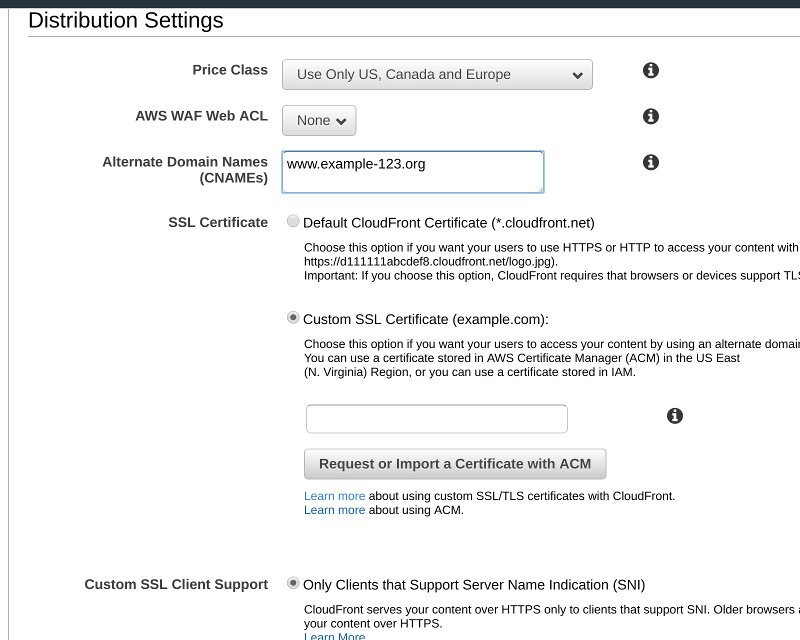 4. Enter your domain name into the CNAMEs and select your certificate.
There are some additional options you can check at your discretion - redirect HTTP to HTTPS and object compression are useful.
After you have created the distribution, make a note of the Distribution ID and wait for the deployment to finish. You should be able to go to the CloudFront distribution domain name and view the site. If not, check the Origin ID and CNAMEs you entered in the distribution and the permissions on the S3 bucket.
Assuming that you can view your site, we only have a few steps left.
Cache invalidation
One of the issues with CDNs is that they typically cache things for a long time (this is their job after all). When we update our site we don’t want people to have to wait for the new content to appear so we need to invalidate the cache.
Go back to your .travis.yml file and add the following lines at the bottom:
after_deploy:
  - aws configure set preview.cloudfront true
  - test $TRAVIS_BRANCH = "master" && aws cloudfront create-invalidation --distribution-id $CLOUDFRONT_DISTRIBUTION_ID --paths "/*"
Then go back to your travis settings and enter your CLOUDFRONT_DISTRIBUTION_ID.
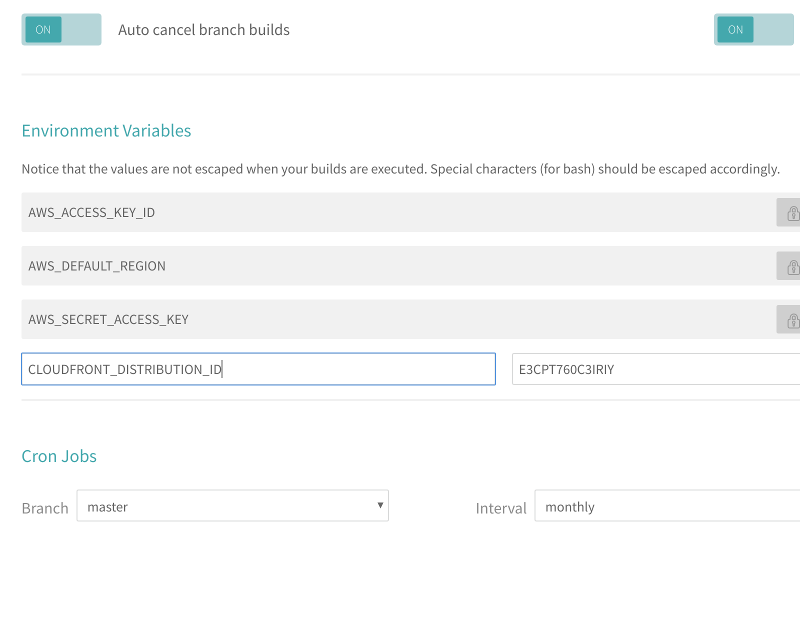 1. Enter your CloudFront distribution ID.
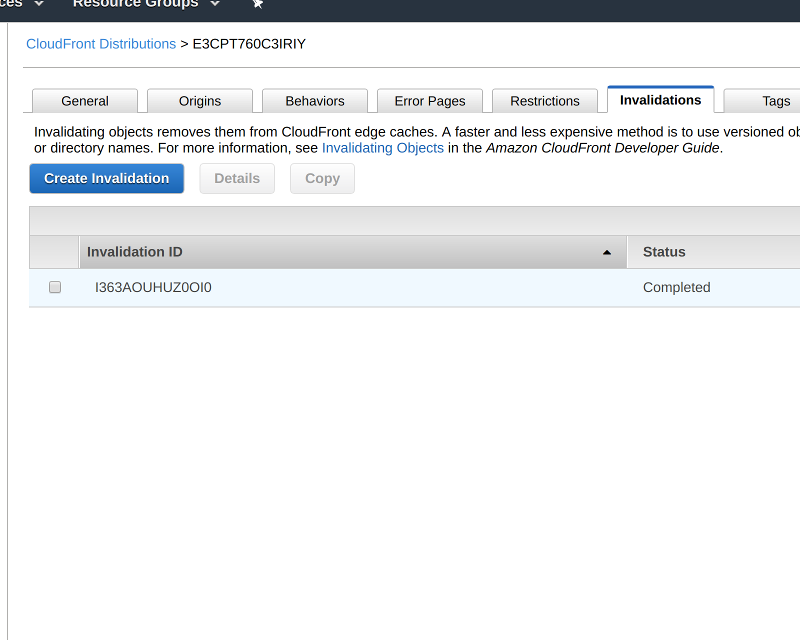 2. Trigger a build and cache the invalidations are working.
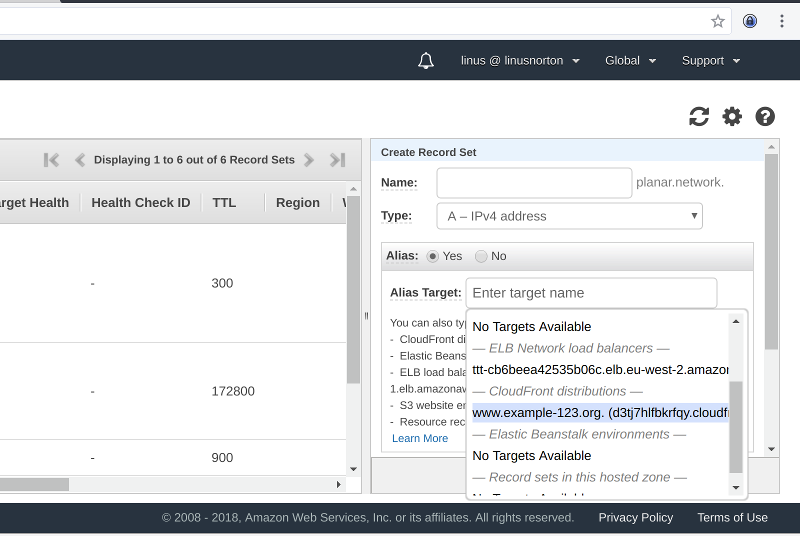
The Final Step
The only thing left to do is to configure Route 53 to point your domain name at your CloudFront distribution.
Once that’s done, wait, pray, sacrafice goats, wait some more and then check your domain.
Hopefully you now have a serverless static website with SSL and automated deployment.