Setting up Swagger with a Koa API
Published 13 February 2020
Swagger has become the de-facto tool for API documentation. Not only does it provide a really good looking UI for the documentation, but it also allows you to validate the every request and response against the API definition.
This guide will show you how to set up an example Koa API complete with Swagger documentation and validation. No knowledge of Koa or Swagger is assumed.
Setting up an API
Getting started with Swagger and Koa is super easy thanks to couple of packages - swagger2 and swagger2-koa:
npm init
npm install --save koa koa-router koa-bodyparser swagger2 and swagger2-koa
If we add a skeleton Koa API in start.js:
const Koa = require("koa");
const app = new Koa();
const Router = require("koa-router");

const app = new Koa();
const router = new Router();

router.get('/health', (ctx, next) => {
  ctx.body = {
    "status": "UP"
  };
});

app
  .use(router.routes())
  .use(router.allowedMethods())
  .listen(3000);

console.log("API started");
Running node start.js and going to http://localhost:3000/health in a browser should reveal a JSON response saying that the service is up and running.
Adding the Swagger UI
Now that the API is up and running we can start defining it using a Swagger file api.yaml.
The first part of the yaml file is general information about the API:
swagger: "2.0"
info:
  title: "Swagger Example"
  description: >
    This is an example Koa API.
  version: "1.0.0"
host: "localhost:3000"
schemes:
  - "http"
Next we need to add our health endpoint to the same file:
paths:
  /health:
    get:
      summary: "Check the status of the service"
      description: "If the service is up and running correctly the response will be 'UP'"
      consumes:
        - "application/json"
      produces:
        - "application/json"
      responses:
        200:
          description: "Service is up and healthy"
          schema:
            $ref: "#/definitions/Health"
        500:
          $ref: '#/responses/500'

responses:
  500:
    description: Internal Server Error
    schema:
      $ref: '#/definitions/Error'

definitions:
  Health:
    type: "object"
    properties:
      status:
        type: "string"
        enum:
          - "UP"
          - "DOWN"
Structuring Swagger files is a bit of an art form but I’ve found it useful to have re-usable responses for errors such as 500 that is defined in the responses section of the yaml file.
Next we add the swagger UI middleware to our Koa server:
const Koa = require("koa");
const swagger = require("swagger2");
const Router = require("koa-router");
const { ui, validate } = require("swagger2-koa");

const swaggerDocument = swagger.loadDocumentSync("api.yaml");
const app = new Koa();
const router = new Router();

router.get('/health', (ctx, next) => {
  ctx.body = {
    "status": "UP"
  };
});

app
  .use(ui(swaggerDocument, "/swagger"))
  .use(router.routes())
  .use(router.allowedMethods())
  .listen(3000);

console.log("API started");
Now when we boot up the application we can go to http://localhost:3000/swagger and view the documentation. It should look something like:
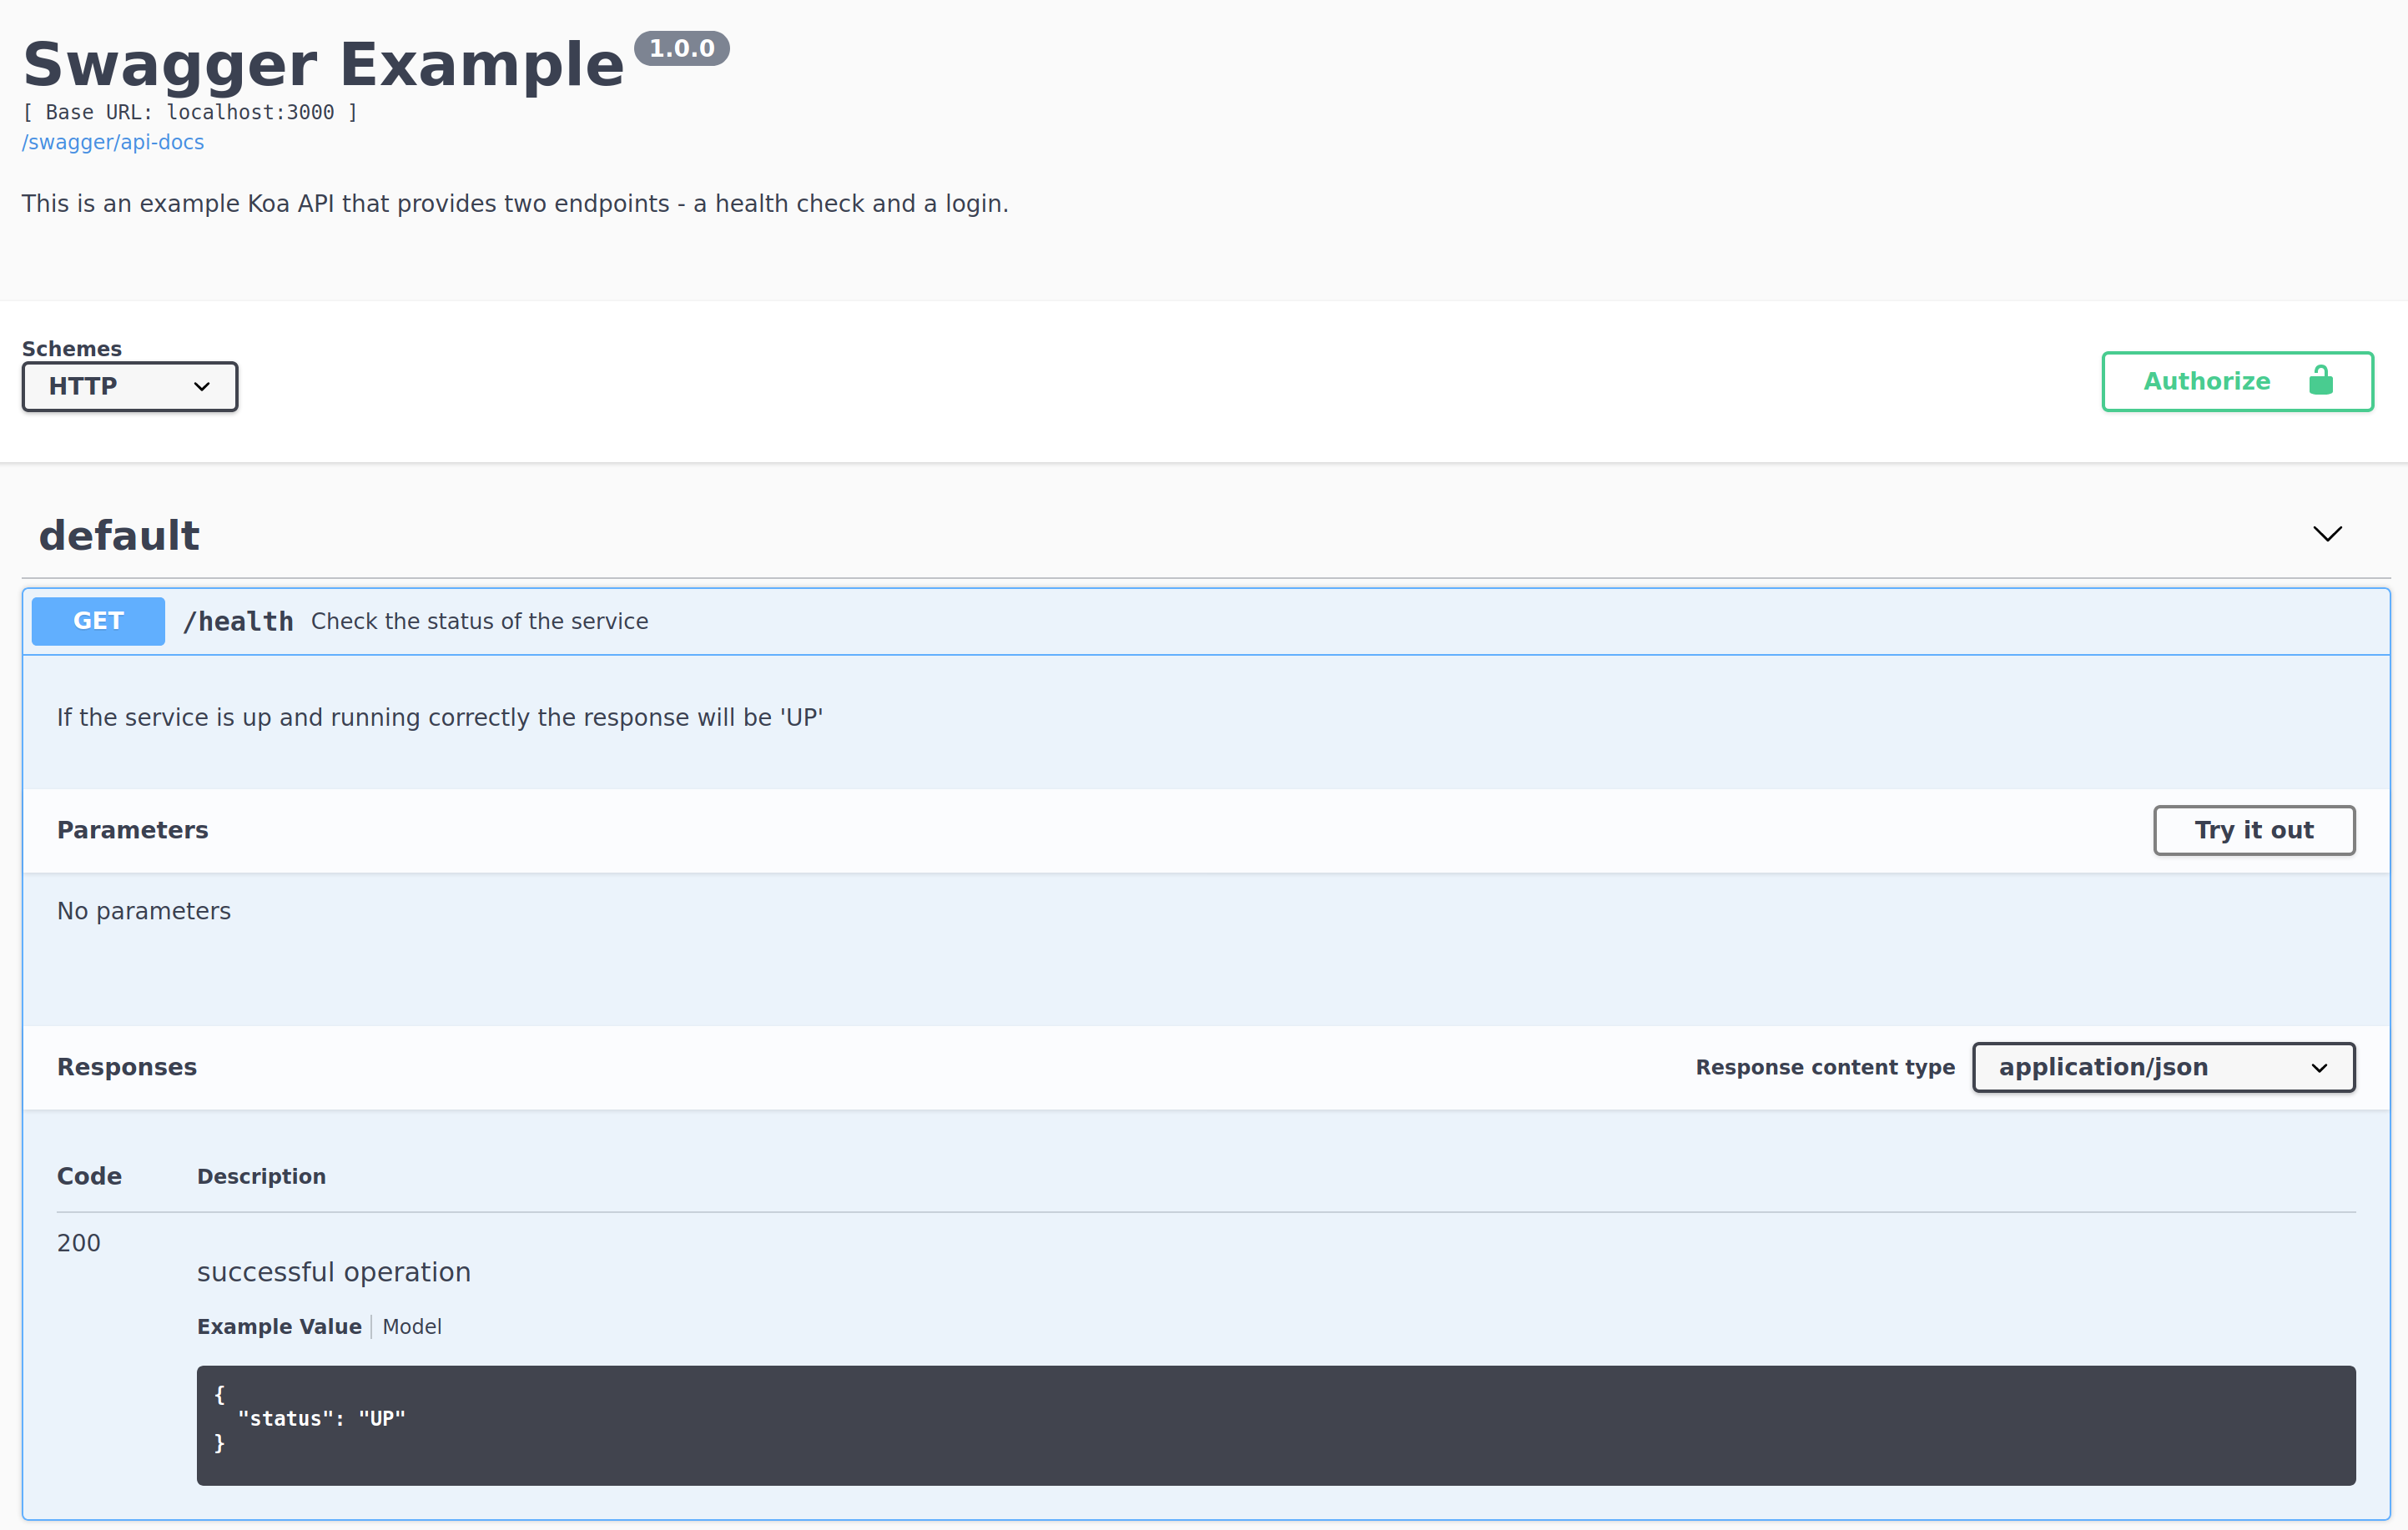
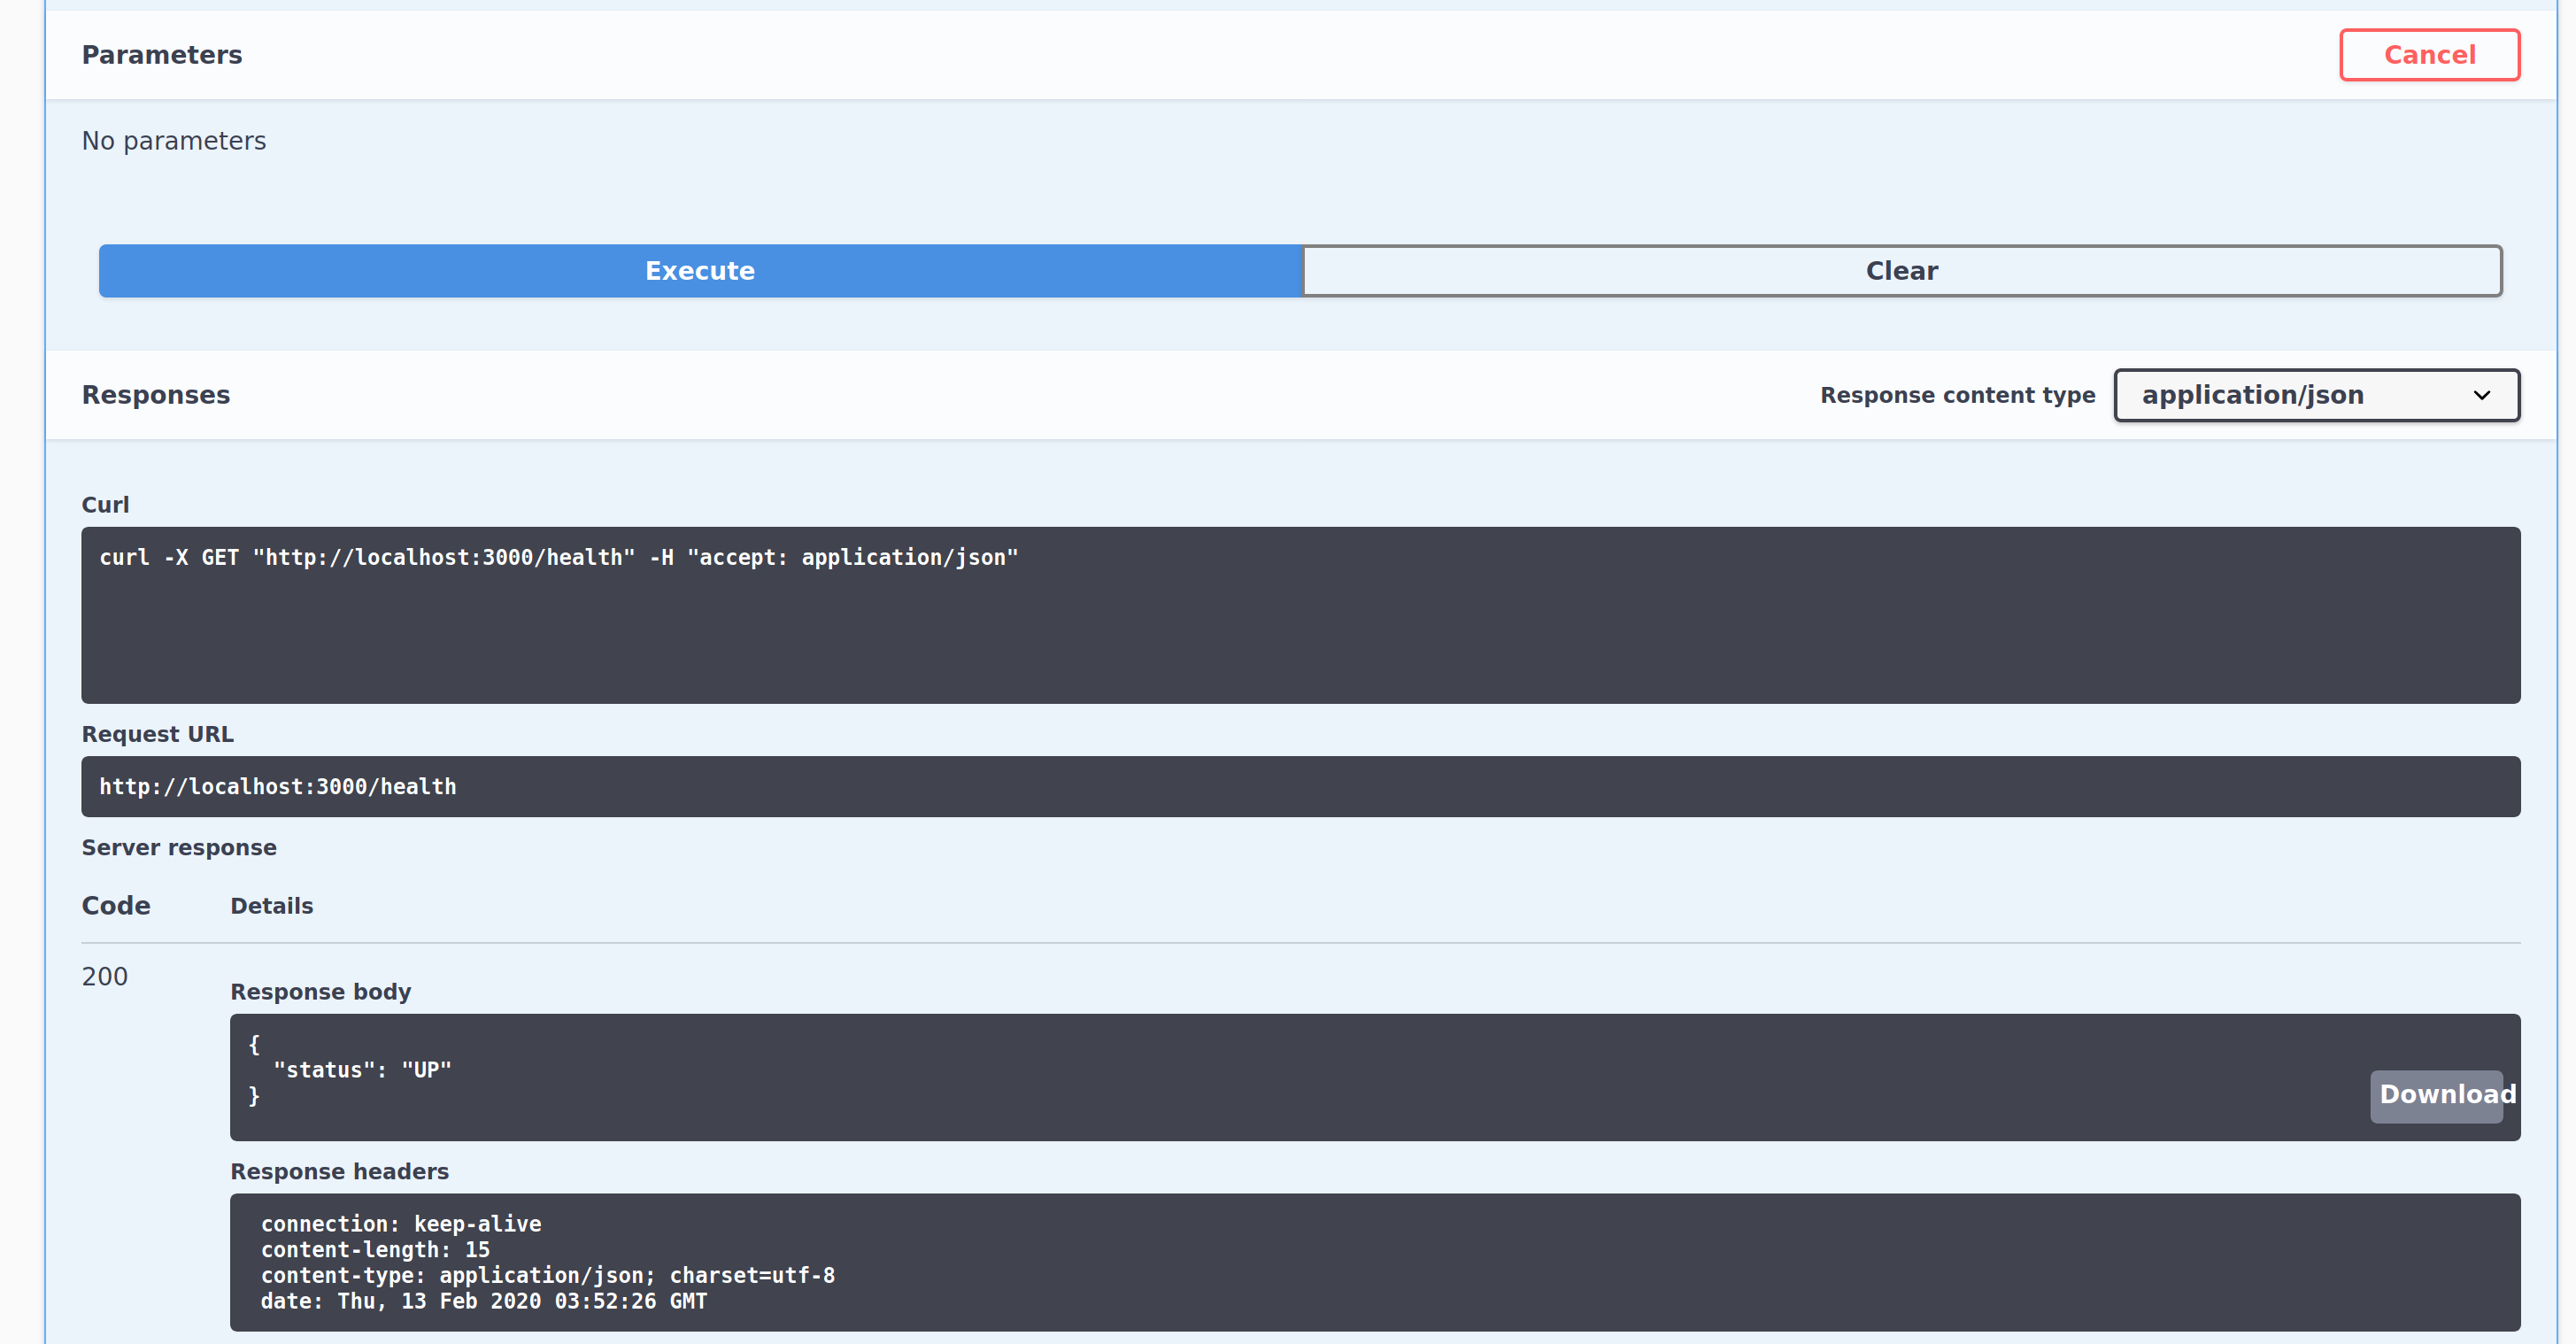
Not only is this use clean and easy to use, it also has an inbuilt HTTP client to test each endpoint. Click Try it out and then Execute and it will display the response and response headers in the browser:
Adding validation
To set up the API validation we can add a new endpoint /login that will take a POST request containing a username and password, and return a token if the login is successful.
  /login:
    post:
      consumes:
        - "application/json"
      produces:
        - "application/json"
      parameters:
        - in: "body"
          name: "body"
          required: true
          schema:
            $ref: "#/definitions/LoginRequest"
      responses:
        201:
          description: "successful operation"
          schema:
            $ref: "#/definitions/LoginResponse"
        400:
          $ref: '#/responses/400'
        401:
          $ref: '#/responses/401'

  # ... other responses

  LoginRequest:
    type: "object"
    required:
      - username
      - password
    properties:
      username:
        type: "string"
        example: "username@email.com"
      password:
        type: "string"
        example: "secret"

  LoginResponse:
    type: "object"
    properties:
      data:
        type: "object"
        properties:
          token:
            type: "string"
            example: "dfjghjk34h5kjhdfkjdfgklj76l8k"
      links:
        type: "object"
The full api.yaml can be seen on GitHub.
Next, we need to add the endpoint and validation middleware. As it’s a POST request we’ll also need the bodyParser middleware:
 router.post('/login', (ctx, next) => {
   if (ctx.request.body.username === "admin" && ctx.request.body.password === "password") {
     ctx.body = { "data": { token: "atoken" } };
     ctx.status = 201;
   }
   else {
     ctx.body = { "data": { error: "invalid login" } };
     ctx.status = 401;
   }
 });

 app
   .use(bodyParser())
   .use(ui(swaggerDocument, "/swagger"))
   .use(validate(swaggerDocument))
   .use(router.routes())
   .use(router.allowedMethods())
   .listen(3000);
Now restarting the app and going to http://localhost:3000/swagger will show the new endpoint. Hitting Try it out will bring up a form and let us start experimenting with different requests.
By default the example values from the yaml file will be populated:
{
  "username": "username@email.com",
  "password": "secret"
}
Sending that request should return a 401:
{
  "data": {
    "error": "invalid login"
  }
}
Setting the username to admin and the password to password should return a 201 with a token in the response:
{
  "data": {
    "token": "atoken"
  }
}
And finally, sending an invalid request by removing one of the fields will return a 400 with an error from the Swagger validator:
{
  "code": "SWAGGER_REQUEST_VALIDATION_FAILED",
  "errors": [
    {
      "actual": {
        "username": "admin"
      },
      "expected": {
        "schema": {
          "type": "object",
          "required": [
            "username",
            "password"
          ],
          "properties": {
            "username": {
              "type": "string",
              "example": "username@email.com"
            },
            "password": {
              "type": "string",
              "example": "secret"
            }
          }
        }
      },
      "error": "data.password is required",
      "where": "body"
    }
  ]
}
It’s quite a helpful, if verbose, response. It tells the client that they have omitted the password field and gives an extract from the documentation.
That’s it! It doesn’t necessarily mean you don’t need to provide your own layer of input validation but it certainly covers the most basic cases: missing fields, invalid types etc.
Further reading
A full code example of this project can be found on GitHub.
Swagger files can become very verbose and there is a lot you can do with them. I recommend using the Swagger Editor if only for the very complete example file it contains.